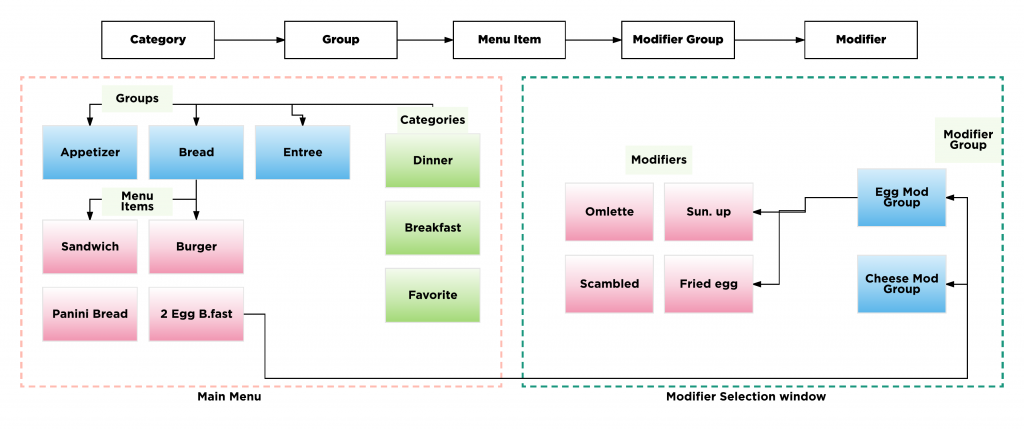
Floreant arranges menu items in a tree structure. In our menu system Categories stays at the top.Then comes groups to display an item in the sales window. Modifiers are dependent sub-items which we do not sell separately. They stays same way under Modifier groups. Items may or may not have modifiers.

Coke does not need modifier.
2 Egg breakfast may have Cheese and bacon modifier group.

 menu

Create Categories

You must create one more more categories to show your items in order taking menu.  Floreant POS hides any category who has no groups or items.

💡 Categories are not printed in receipts. However in backoffice report you can generate sales report by groups and categories.

In this example we will create two categories, Sunday special and Dinner Special and each of them will have one items as follows

Category Explorer

019_FP_Making_Catagory

Here you can add followings to make a category:

  1. Name
  2. Translated Name.
    You can ignore this or type same name you entered before
  3. Sort Order . This will sort items in Ticket editor screen.
  4. Text Color. Like button color you can add a text color.
  5. Beverage.
    💡 Beware. Beverage category will skip Kitchen Printer.
  6. Visible.

Setting Button Color

Once you click on it it a window will popup to select your desired button color 1

Button color selection

  • Can select colors from swatches or type RGB value of color in RGB tab.

[ Light] If you want to get more consistent look you can choose Flat colors ( https://flatuicolors.com). Make sure text is readable in that background.

Create Groups

To add menu group go to Back Office→ Explorers→ Menu Groups→ Add2


You can create as many groups as you want under a category.

💡 Floreant POS will hide any group that no items.

💡 Groups may not have any category assigned. In that case all items under that group will not be displayed in order taking screen. If there is only one group under a category. Floreant will directly show these items under that category.

  • Name
    You must put a name. You can put a name in different languages. Capital letters are preferable.
  • Translated name
    Often same as the name or else you can leave it blank.) Category .
    If you don’t put it under category it will not show in order taking screen. Sort Order. (Optional).
  • Color
    Set color of button and text.
  • Visible.
    Finally make it visible so that you can see it in the order taking screen.

Create Menu Items

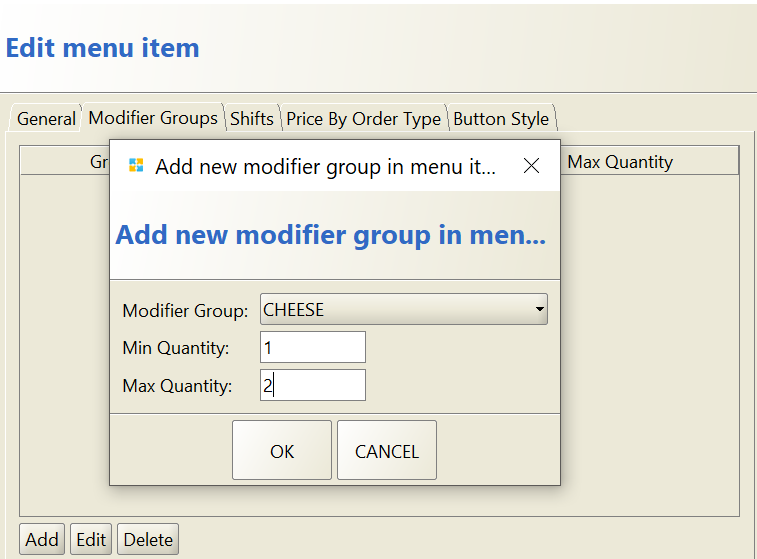
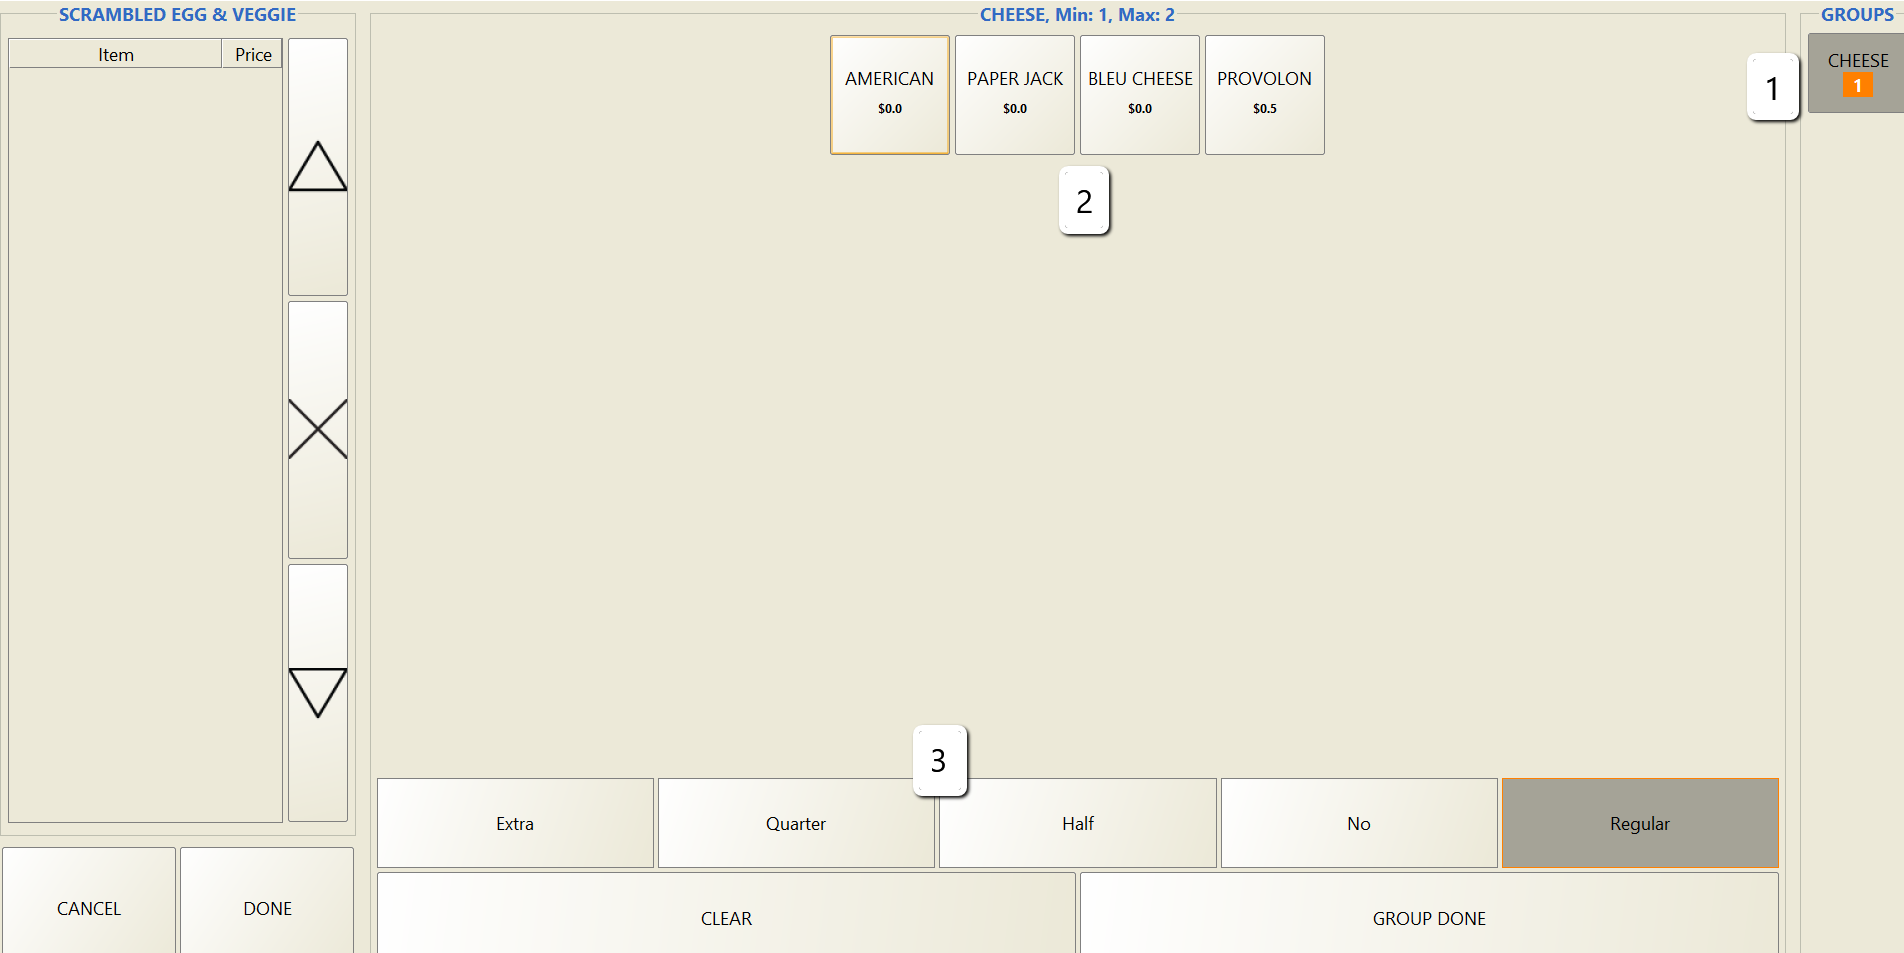
💡 If you have modifiers in an Item you must create modifier group and modifiers first.

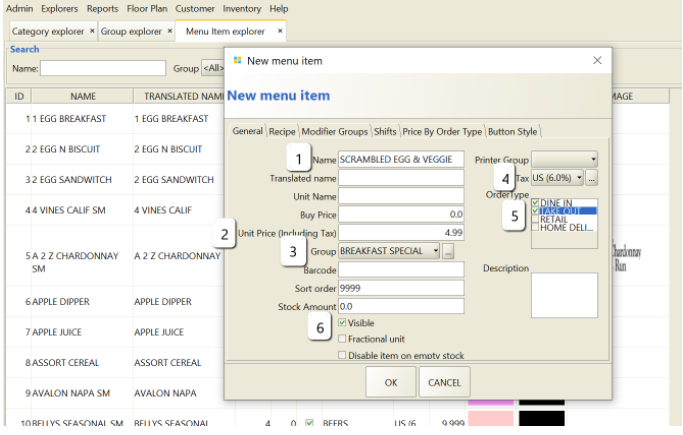
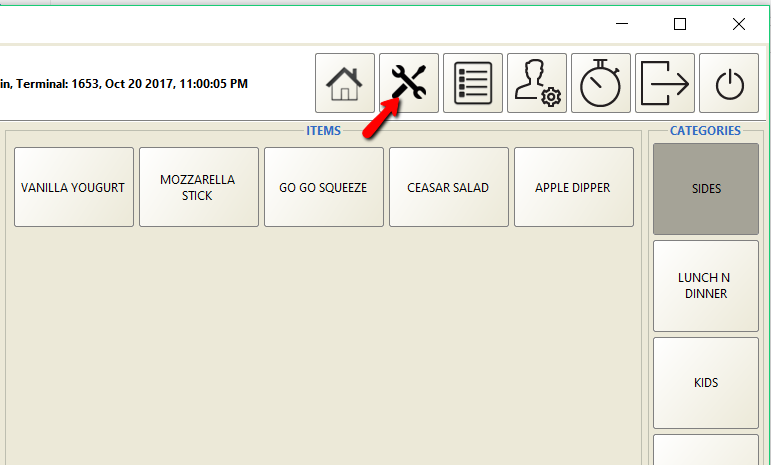
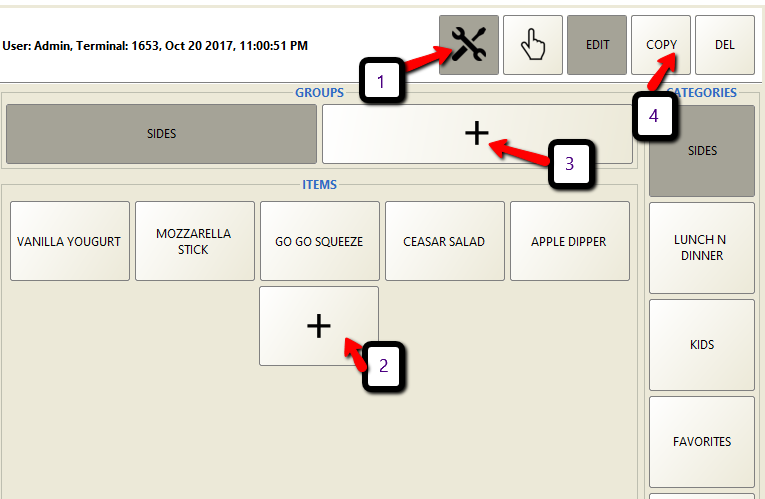
To add menu items go to Back Office→ Explorers→ Menu Items→ Add

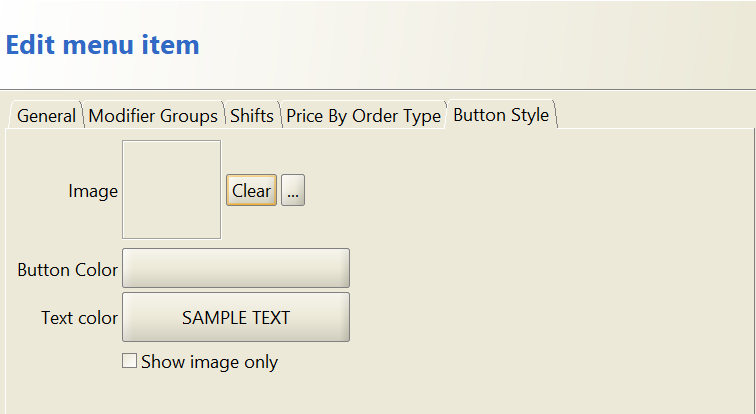
This entry dialog has multiple tab. In the first tab you will find the followings
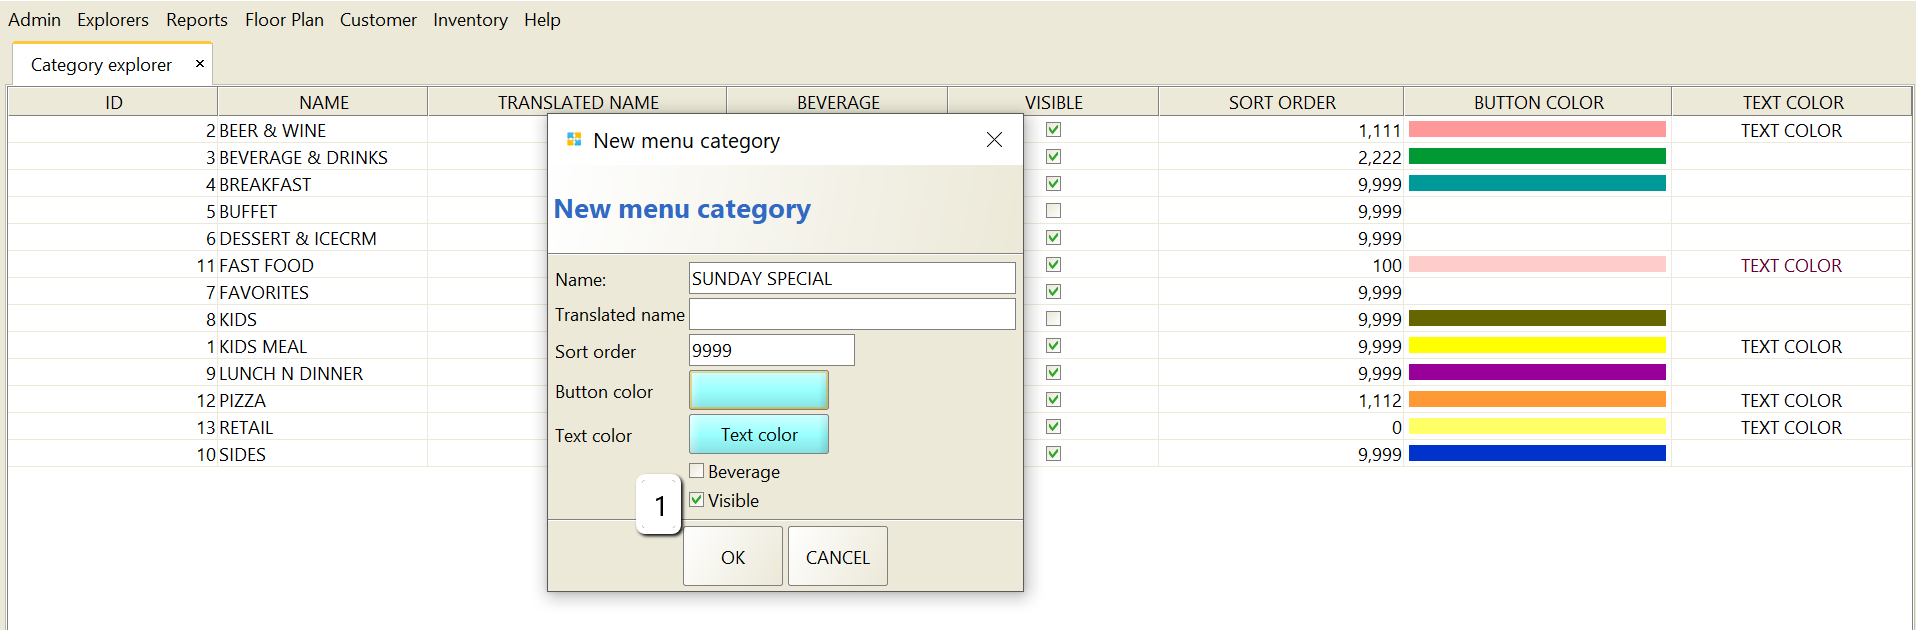
  1. Name
    This is the name of the Item you will see in button as well as printed receipt. Make it short and easy.
    💡 Keep it less than 20 characters.
  2. Translated Name. 
  3. Unit Name.
  4. Buy Price(Optional).
  5. Unit Price.  Add the price you want to sell.
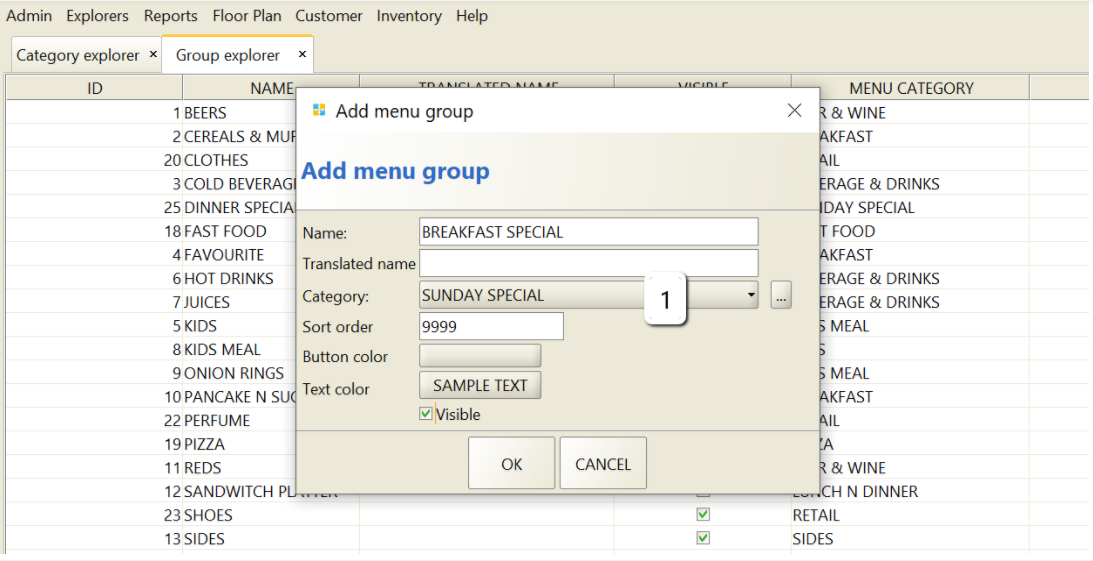
  6. Group. Select Menu Groups you want to show the items.
  7. Tax.
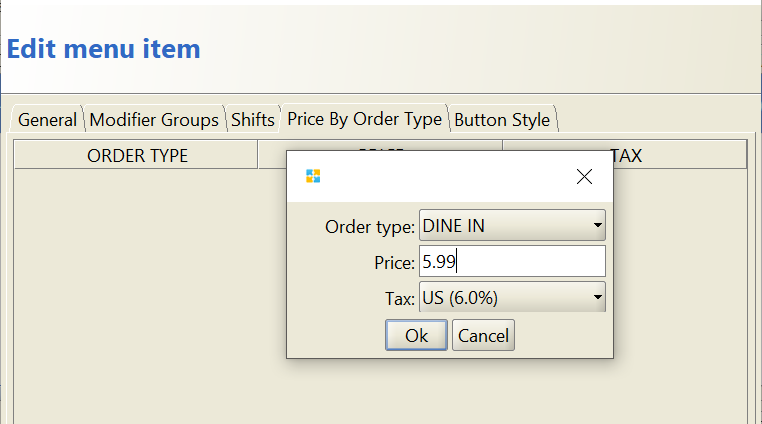
  8. Order type. Leave it blank
    💡 If you do not select any item will be displayed in all order type.
  9. Visible.
  10. Fraction Units

💡  Examples are items sold by weight. If you turn this on fraction units, it will let you enter any amount with 2 decimal point. If you need to use Digital Scale you may contact OROCUBE.

10. Disable Item on Empty Stock.

💡 If you turn it on it you must update available quantity of that product here.

4

 Modifier Groups in Menu Items

🏁Back office→Explorers→Menu item explorer→Select menu Item→add/edit→Modifier groupsFP_Adding_Modifier

  1. Modifier Group:
  2. Min Quantity
  3. Maximum Quantity
    💡 Min Quantity defines force modifiers. Say 1-Egg breakfast must choose 1 egg otherwise it will not complete the order.
    💡 Max quantity is more useful for free included items. Example 2 different cheeses may be included in price and we do not want to give more than that. If you do not want to enforce it you can make it a large value here.

Shifts in Menu Items

🏁Back office→Explorers→Menu item explorer→Select menu Item→add/edit→ShiftsFP_Shift_Adding

This feature allows you to change price based on predefined shifts. This is an optional feature that you can ignore.

Price by Order Type

🏁Back office→Explorers→Menu item explorer→Select menu Item→add/edit→Price by order typeFP_Price_By_Order

From here by selecting Order type you can price your menu items differently. Like for the same item Scrambled Eggs & Veggie you may want to charge $1 extra to the people who comes to the dine in.

Button Style for Menu Items

🏁Back office→Explorers→Menu item explorer→Select menu Item→add/edit→Button styleFP_Button

Unlike categories and groups  you can add Image for your button and change its button color and text color.

💡Picture size should be less than  20k.

Modifiers with Multipliers in Frontend

Order_Taking_with_Modifier

Once we select our menu item Scrambled Egg & Veggie from our order taking screen it will prompt a new page now where we can select our modifiers & multipliers.

  1. Modifier Groups: The modifiers group we just added for our menu items.
  2. Modifier Items: Different modifier items. We made different modifier items under modifier groups. So you can have multiple options for one modifier group.
  3. Multipliers: Multipliers are % of modifiers items. In case customer wants different % of modifier items you may choose them. Or else regular will be selected auto. And when your modifier item selection is done just press group done and your order will be done for this menu item.

Maintenance Mode

This is a special feature since 1.4 build 1500. Managers can create, edit and duplicate categories, groups and menu items from Ticket edit window.

mentainence_button1

  • Navigate Menu and select Menu Objects
    Can move across Categories or Groups to find desired object.
  • Edit existing Object
    Clicking on any object will open it in edit mode.
  • Copy/Clone existing Object
    This will copy any object when clicked.
  • Delete Existing Object
    It will delete object. We need to make sure that object is not used in any ticket.
    💡 You can 86 any item by editing item and turning off its visibility.


mentainence_button2

  • You cannot delete any items or groups when you have made transactions with them.
  • We do not have option to reset all tickets and transactions.  So one good idea is  make a copy of the database when you finish menu programming.  After testing you can switch back to this copy for final deployment.